12.1 Creating an additional identity
Instead of importing an additional identity from a directory, you can add the details manually. The User Principal Name, Distinguished Name, and User SID must match an entry in a directory for the additional identity certificate to be used for Windows authentication. You must ensure that the details you enter are correct for the systems that will use the certificates.
You can create an additional identity manually only for another person; you cannot create an additional identity manually for your own account. For your own account, you must import an additional identity instead to ensure that it comes from a trusted source.
Note: If you have a credential issued to a person that supports additional identities (that is, it has the Issue Additional Identities option selected in the credential profile), and you create an additional identity, if the Automatically create card update jobs when additional identities are modified configuration option (on the Issuance Processes page of the Operation Settings workflow) is set to Yes, a job is created automatically to update the credential.
To create an additional identity manually:
-
Search for a person, and view their details.
See section 4.1, Searching for a person for details.
You can also view a person's details from any form that contains a link to their account.
For example:
- Click the link icon
 on the Full Name field of the View Request form.
 - Click the link icon on the Owner field of the View Device form.
- Click the link icon
-
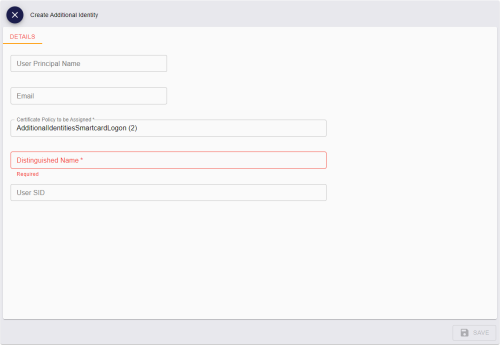
Click the Create Additional Identity option in the button bar at the bottom of the screen.
You may have to click the ... option to see any additional available actions.
Note: You cannot create an additional identity manually for your own account.
-
Complete the following details:
-
User Principal Name
-
Email
-
Certificate Policy to be Assigned
Note: If you have only one certificate policy configured for additional identities, it is selected automatically.
-
Distinguished Name
-
User SID
-
-
Click Save.
The View Additional Identity screen appears.
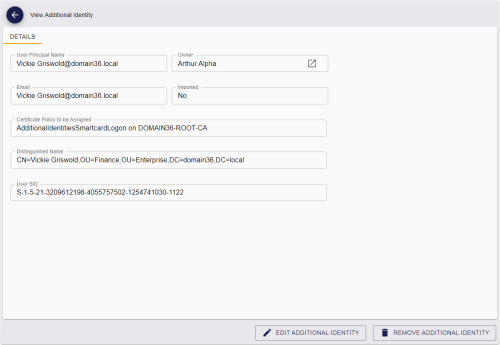
You can access this screen at any time from the Additional Identities tab on the View Person screen.
From this screen, you can:
-
View the details of the additional identity.
-
Edit the details of the additional identity.
-
Remove the additional identity.
-

